For Phoenix Comicon 2017 I decided that I wanted to recreate one of the alternate outfits for Cassandra Alexandra of Soul Calibur 3. This video game was near to my heart (I played it constantly during High School) and it was time I honored the game by cosplaying one of my favorite characters. To create this costume you will need the following skills in your repertoire:
Pattern Making Skill
Sewing Skill
Drawing/Drafting Skills
Painting Skills
Sharp Object Awareness
Safety Awareness
For fabric materials I used...
2.5 Yards of Blue Broadcloth
8 yards of gold vinyl trim
1/4 yard of pink broadcloth
1 yard of stiff interfacing
1/4 yard of white polyester stretch
1.5 yards of Maroon ribbon
1 yard of white 4 way stretch spandex
1/6 of a yard of pink ribbon
1/4 yard of brown broadcloth
1 piece of gold embroidery thread
LOTS of blue thread
LOTS of gold thread
LOTS of white thread
1 yard of stiff elastic
1/4 yard of 2 way stretch metallic gold spandex
For prop materials I used...
1 3x3 foot piece of insulation foam
1 yard of 4 mm thick EVA foam
Contact Cement
White Caulk (Kwik Seal)
Wood Glue
Metallic Silver Spray Paint (2 cans)
Pink Spray Paint (1 can)
Plasti Dip (2 cans)
Triple Thick Glaze Sealant (2 cans)
Cardboard (for painting on)
Paint Brushes (for fine details/cleanup)
I purchased a wig from Amazon then trimmed the bangs, pinned the back and trimmed the pony tail so it fit the character's appearance more.
Let's get started!
Step 1: Pattern Making
Patterns are a BIG part of this costume. I could not find a pattern that worked for this character so here are the steps I took to make each item...
Jacket/Suit/Top
I have a dress form that I set to my measurements. I then added a bra underneath it and made sure the breast matched what I was going to wear the day of the event. Once all measurements were right I pinned a piece of muslin around the dress form then began to adjust the drape of the fabric until was tightly fitted to my dress form. Once the pattern was fitted and pinned I cut off the excess (so it was easier to work on) and drew on the actual pattern. With the pattern drawn I cut off the remaining excess fabric and tested the garment on myself AND the dress form. You can skip all of this and use your own body by using THIS pattern making method (NOTE: you WILL need help).
Boot Covers
I used THIS method to create my pattern for the boot cover (works best with stretchy fabric). I added a stiff, non-roll elastic to the top and used a measuring tape to figure out how best I should create the triangular blue fold on the top.
Bow
This is super simple. Seriously. Just go HERE.
Gloves
Literally follow the same method as you did for the boot covers but with your arms then trace your hands onto 4 way stretch fabric. DO NOT CUT THE GLOVE OUT! Pin the two sides together, sew them, THEN cut out the glove (this makes it MUCH easier to sew).
Pauldrons (armor on upper arms)
I have A LOT of armor making experience so I just drew a hill on my foam with a large half circle under it to make the base pattern for my pauldron. You can find a pauldron pattern HERE.
Shield
I checked the dimensions of shields online then made mine a bit smaller and drew it by hand. You could make this easier and scale a printed version of Cassandra's shield to size on a computer then print it out.
Sword
I checked on the average scale of short swords, adjusted them per the character's scale, and drew this by hand. Again, you could scale up on a computer and print to make this simpler.
Step 2: Body Suit/Jacket
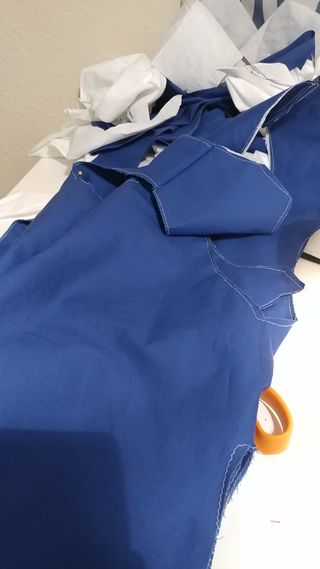
The jacket started out as any other sewn item: a pattern. I used blue broadcloth and layered a stiff interfacing between two layers of blue so the jacket would have more rigidity. Once all my pieces were pinned and then sewn I tested the fit. Here I discovered a few mistakes with my measurements (they were all big) and I used darts to correct the fit errors. With the fit in order I had to come up with some way to add gold trim to Cassandra's jacket.
At first, I considered using Gold Bias Tape but it was either too rigid OR too stretchy and I could not get the proper color. Oddly enough, while perusing fabric and tapes I happened upon a gold vinyl that was folded and ironed into an even rectangular strip. I purchased 7 yards of this vinyl (which was meant for belts/strapping) and cut it in half then peeled the iron portions apart and suddenly I had "bias tape" that I could apply as trim to my jacket.
Vinyl is NOT easy to sew. I learned this the hard way and wound up with some rippling in my trim due to issues with pinning/clipping the trim to the material. However, the trim still turned out lovely and after several hours of work it was complete. For the gold detailing on the sides, back and front I purchased some 2 way stretch metallic gold spandex and cut it to form the unusual shapes of the details on Cassandra's jacket. I glue it on with high temperature hot glue and, at a later time, I intend to embroiderer around the edges with gold thread to add stability and longevity to these designs.
For the corseted back/front I added some d-rings under the gold trim and used burgundy ribbon as the lace.
NOTE: Because of HOW I opted to make the jacket it is now dry clean only. To make this machine washable use gold bias tape or spandex for your trim and wash on cold. DO NOT dry in your dryer, hang dry instead :)
Step 3: Boot Covers, Gloves and Bow
Boot covers, while aggravating for me, at not too terrible when using 4 way stretch fabric. I used THIS tutorial to create my pattern for the cover. I did not want the whole shoe covered so I cut off the tip of the pattern and then sewed the underside (where the heel elevates) together so I could slide it on like a sock. This worked but a part of the cover (near the ankle) refused to stay put so I use some hot glue to adhere it to the shoe. I added some gold vinyl trimmings for detail and the base was complete.
At the top of the boot cover I added 2" elastic so I could keep it up on my thigh without the cover falling down (I used the type of elastic that does not roll).NOTE: Using the non-rolling elastic will create a pinching like sensation on the skin, if you don't like this you can use THIS tutorial to attach the covers to dance tights. Next I measured the circumference of my thigh where the boot cover ended and created the blue/white/pink accents at the top using broadcloth; then sewed them on.
With the boot covers completed I moved on to the gloves. These are simple for me. I traced my hand onto my white, 4 way stretch spandex then measured the length of my arm and it's top circumference. From there I drew lines that widened out (sort of like drawing a cylinder that expands at the top). Next I folded the fabric in half (keep the drawing straight, DO NOT fold it) so I would sew the sides together. I pinned my fabric and sewed the side together (using the lines for reference). Once the glove was sewn I cut it out then flipped it inside out and I was done! If this is confusing use THIS TUTORIAL for reference.
For the bow I created a rectangular tube that was 3" high and 12" long. I sewed the top and bottoms together (leave the sides open); then flipped it inside out using the sides (aka tube). Step 2 was sewing the open sides together (fold them in to hide the seams) and folding the long strip into thirds. I brought the two sides down a bit then pinched in the middle and added a vinyl strip to keep the bow secure. I pulled the two loops up and added a couple stitches at the center for stability. I used THIS tutorial for my first bow and it has helped me since. With the bow constructed I began to embroider it using a standard needle and some embroidery thread. The final touch was adding a hair clip to the underside so I could easily attach it to my wig.
Step 4: Sword, Shield and Pauldrons
Props and Armor are things that I always enjoy making (no matter how frustrated I get when I goof). Let's talk about the sword first. Here is what you will need to make it:
Yard Stick/Large Ruler
Foam Cutter OR Utility Blade
Sand Paper OR Rotary Tool OR Sanding Block
Markers/Pens/Pencils
Insulation Foam (over 1" thick)
Wood Glue
Sponges/Brushes
Water Cup
Plasti-Dip
Spray Paint (Silver/Gold/Blue/etc.)
Acrylic Paint (so you can weather the sword)
To get started grab a reference image of the sword and draw it onto your insulation foam using a pencil OR marker OR pen. If you are not comfortable with drawing the image then it can be printed and traced onto the foam instead. Once you have your pattern laid out it's time to cut it out! I used a combination of a utility blade AND a hot knife. Be careful what surface you cut on and take your time (it's better to cut outside the lines than in them as you can always sand off extra product). As soon as you have the sword cut out you must sand the blade down so it has a distinct angle (think of how blades/swords are in real life). You also need to sand where you cut and round out the hilt/pommel as insulation foam is very angular.
With sanding complete it's on to painting! But wait! You CAN'T apply spray paint or Plasti-Dip to insulation foam so HOW do you prime it? You'll need Wood Glue, Water and a sponge applicator OR brush. Apply an even coat of wood glue to your sword (make sure you get EVERY nook/cranny/dent covered). Allow the glue to fully dry (it dries where I live in about 2-3 hours but it could take 4-6 for other climates). You'll need to cover both sides so it will be a paint wood glue on one side, allow it to dry, flip it over and apply again on the other side kind of thing. I applied two coats to my sword but one will do. Before painting allow the wood glue to dry for up to 12 hours (that way you can sand any imperfections if needed).
Now that you have your sword primed you can paint it! I primed it again with Plasti-Dip (it creates a smooth, even surface for painting) then I used Rustoleum quick dry spray paint for the rest. Add some details with acrylic, seal the sword with some type of lacquer OR mod podge sealer and you're set!
SHIELD
I used layers of 4mm thick EVA foam from TNT Cosplay Supply for the shield. I measured the size using my yard stick and drew out the design by hand (again, you could print yours out). With the base shield drawn I cut it out then traced it onto another piece of foam and drew an interior design for the shield. I cut that out then glued the two pieces together using contact cement and superglue. Next traced the shield one more time and enlarged it's trim. These pieces were also glued together with superglue.
With everything cut/glued I primed my foam for painting by heating it up with a heat gun and shaping it into a curve. Next I primed it with Plasti-Dip, painted it pink and allowed it to dry for 2 hours. With the first coat of paint dry I brought it inside and used painter's tape to block out where I wanted the shield to be silver. Next I sprayed the silver parts using Rustoleum Metallic spray paint and waited for it to dry.
Once dry I removed the tape, touched up some areas with acrylic paint, weathered the shield with acrylics and sealed it with a Triple Thick Spray on lacquer.
PAULDRONS
Making pauldrons can be tricky. I have A LOT of experience with this type of armor but for those of you who do not here is a GREAT TUTORIAL explaining how to make foam pauldrons. To attach my Pauldrons to my costume I created and band on the inside and slid them on like you would an arm bangle.
Step 5: Lessons Learned / Final Result


 If you want to see a short video on how I did this, or want see more of my work you can follow me on instagram! @Mirandavanr :)
 For the first step it's probably the best to trace out where the skull part of your face will be. i did this using a nyx eyebrow pencil. I wanted the socket, nose, and jaw of the skull to show so i traced about half of my face

 if you have troublesome skin like me, or just like foundation then this is the time to apply it. You could apply it over your entire face but since half of it is going to be covered up in paint anyway that would be a shame of product so i just applied it on the 'normal' side of my face
 Only one eyebrow is going to show so i'm just filling that one in with the same nyx eyebrow pencil.
 i know this all isn't really neccesary for the skull part but since it's still a pirate look I went for a dirty smokey eye. I feel like that gives the pirate vibe better rather than just skipping it and only doing the skull part

 Taking, once again, my nyx brow pencil i'm tracing the skull lines so i'll know where not to paint in the next step. (inside of jaw, eyesocket)
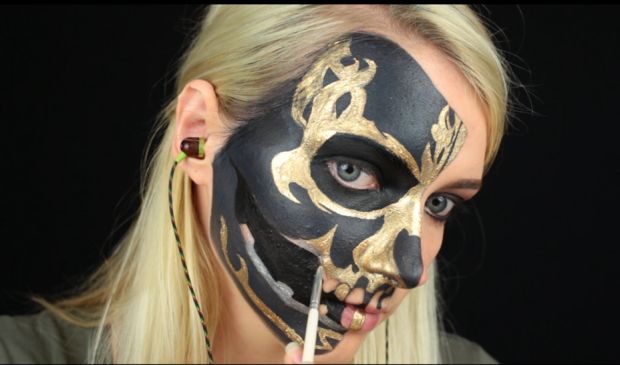
 The skull on the movie poster looks more dark grey than black, so I mixed Mehron's paradise paints together to create this colour. And with that i'm filling in half of my face. I made sure to create a crisp line at the edge of the skull part so the 'pulling the skin' effect at the end will look more real
 Another reason why I didn't paint the skull black is because I want the eyesocket to show. If you made your skull black, the eyesocket will just blend in and won't be visible enough.
 With mehron's gold pigment (you mix these with a special liquid and they turn into paints) I started recreating the details. It's best to keep the example picture with you while doing this
 Step 12: Adding the Details (2/3)
 Step 13: Filling in the Jaw
 The jaw's inside is black and the edges (teeth, gums) are silver. I used mehron's silver pigment to fill these in. Some of the teeth are gold, and one tooth has a red diamond on top of it.